Monday, 21 October 2013

paper cutting

For this assignment, we welcome back our paper cutting skills but this time with a little twist to it. 


let me ask you? 

WHAT IS A SQUARE? 

WHAT IS A SQUARE TO YOU? 

WHAT DO YOU THINK OF WHEN A SQUARE IS SHOWN?

IS A SQUARE JUST A SQUARE? 

CAN A SQUARE BE ANYTHING ELSE ? 


can it be a button? 


or a sunflower? 
or any flower... 


or even a square of jelly fish? 


a square of fingers? 


bubbles of squares? 


square in every kind of dimension? 


or is it just a plain square to you? 


or a sponge as a square? :) 


or maybe its a different shape of a square? 


SOUNDS DEEP HUH? 

...
I know. I was mindblown when were asked this question " what is a square? "
never really occur to me before that a square can be many things, many things actually comes from just a square itself. we could do so much just with a 5x6 piece of square paper and made it looked as if its not just a square. 


After much searching, I finally came up with an idea.
this is one of my very first sketches. 


any guess on what it is? 

.
.
.
.
.
.
.
.
.
.
.
.

YEAP! lanterns :) 

I got inspired by this pictures. initially, i actually was thinking about the cartoon movie, " Enchanted" and plus i wanted a theme that describes freedom, friendship, togetherness, and something bright.

I got my yellow paper ready 
started off with the trial version of the assignment just to get the hang of
the knife and also to see whether this theme would actually work for this "square assignment" 


see the bits and pieces of the cut out lantern parts? :) yeap I had to paste one by one o the little pieces outside of the small square paper.

And because our assignment had to have 1) symmetry and the other one 2) Asymmetrical. futhermore we had to use every single small little pieces that were cut out from the square, nothing was suppose to be left behind.

sounds like a lot of work? willllll, wait until you see how everything turn out ;)

As i got started with my first square, I cut out all the lantern patterns form the square and kept the small bits all together in a small jar incase if i loose any of it.


 this wasnt just it
there was more i tell you haha.


What do you think about the end product? :) 


I'll post up how we presented our assignment on the next post. 
it was amazing! 
so stay tune! :D 

Sunday, 29 September 2013

float


First Process : 

As announced, we were told to prepare for a floating exhibition on campus after much discussion with the whole class, we came to a agreement on lanterns and floating canvases. 

to make our lanterns we had were divided into 4 groups : chinese, malay, indian and minorities 
I joined the minority groups to feel "much at home" again. Since I haven had the east malaysian feel for a long time, i decided to do panterns of it to "feel" it again haha. 


this are the two first designs I came up with : 


and while in the process, I cut my finger :(


Ill post the other design stencils in my other post
 because I haven taken the pictures down for it yet. 

sooooooo... stay tuned AND BE EXCITEDDD  :) 

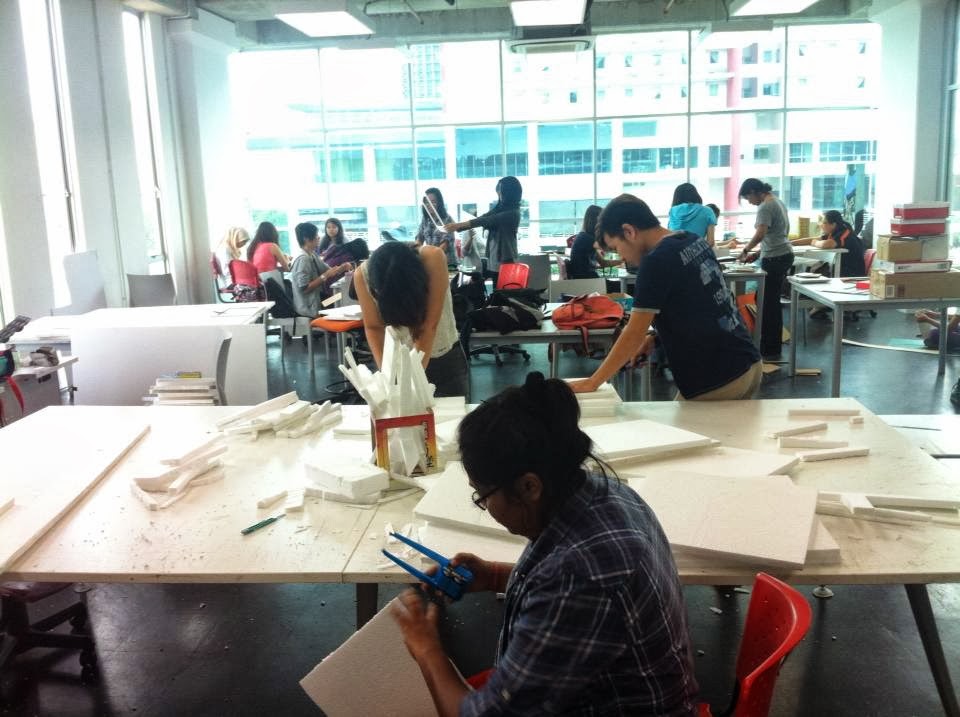
After managing all our stencils. we then assign ourselves into 3 groups : 

 cutting styrofoam, cardboards and also measuring cardboards.
this the making of our lanterns 


It was an experience of cutting styrofoams and also cardboards. the proper ways to handle the knifes and how to cut different kind materials. after all the cutting and the putting together of parts of the lanterns, i must say it was pretty successful :)

really cant wait for the exibition now! xx

Wednesday, 24 July 2013

Self portrait

SOOOOOOOO. Our semester 2 has began, pretty excited yetttt a little terrified to see what we have to face for this semester. 

As for our  first class of 2D design class, we were asked to come up with a self portrait describing ourselves, Again. BUT THIS TIME with a little twist ( of course). We not only had to come up with a self portrait of ourselves.. we had to be creative and use materials ( leaves, stones , wood, branches, water... etc ) to built our self portrait. 

it sounds exciting? yeap it is, but a little challenging too since there was not much material that could be found on campus except for rocks/stones, duck/ goose feathers, leaves, grass, mud. And me wanting to be different, I had to think of other materials that most people would not think of using. I did not want to have something common, but yet still explains the same meaning to what i have to say about myself. 

After much thoughts, i finally thought of BALLLOOOONS. I initially wanted feathers or something light yet to go with my freedom concept. And then i thought harder. 

The description for my self portrait was : I am who I am, i do not like anything/ anyone that is fake. I find myself difficult to face unreal statements around me. once I cant put myself in liking a certain someone/ something I would not fake myself in liking it. In short, I'm not a two face kind of person. Also, I like to be free and not be under any control of anything/ anyone. I like to be able to move about and do what i like --- ( can be a rebel when I have restrictions ) 

and soooooo, my idea of a balloon came about :) 


I was so worried on whether i could actually find balloons on campus. I tried asking around but no one knew where to get em. and finally when the stationary shop on campus opens, i was the first one dashing in looking for balloons. and of course i jump for joy when i found them :DDD

I created a balloon image of me.  Gave it eyes, nose and mouth and even made strips of hair out of paper and some tape  to give it some volume to my "sculpture"


I had fun :) 

Saturday, 1 June 2013

Greeting cards


As I said in my previous post, my theme was clouds and steampunk. 
I went around every where looking for every possible looking steampunk materials. I got some screws and metalic looking nails in the DIY shop in Sunway Pyramid, and cut off some of my unworn bracelets and watches ( which was alright because those have been around for ages just lying there being useless. haha) 


A few of the materials I used :) 


One of the first few ideas I came up with,
 which I was very satisfied with the outcome of it.


 A " Thinking of you" card
instead of having butterflies in the tummy, I had them replace with cogs.
yay, or nay? haha


I was inspired with a picture i came across on the internet so I made this concept and was not sure what card it should be. And I initially wanted butterflies and flowers and cogs and everything with clouds coming out as the hair but it was a little too much..


This was what I had a week after tutorials. 

We were given another week to finish off everything else. which means, more time to think and more time to come up with awesome ides :D 

I had to google and search on different kinds of other occasions celebrated to come up with the last few cards. it was such a challenge having to put the theme clouds and steampunk together. I had a few ideas but a had to change it at the very end due to the materials I had. 

which was fine....
because everything turn out fine of course :) 


My " Father's day" card
I had this painted with tea as the background since I couldnt really put in cogs into this card. I could, but i just did not want all my cards looking too cliche. and this was another new thing I was doing, putting tea onto paper, I was kind of worried on how it would turn out to be like, whether it would be messy or the color would come out wrong. but i was pretty satisfied with the outcome of it :) 


TADAAA~~


my fourth card is the " Merry Christmas" card 
I wanted most of my cards to look as simple as possible, I did not want anything to messy and too much going on. so for this i had Mr Santa Claus on the front with bread made out of cotton balls ( supposingly as clouds) and heads with cogs as a little oomph to it :) 


I would say i was pretty happy with how my cards turn out to be like. what disappoint me was the type of paper that were used. It did not come across to me that I had to get proper card material paper in order for my cards to not turn out to be crumply because of the glue and paint after it dries.

hmm, but I'm just glad that I challenged myself in this, and tried a few new things during the process of making my greeting cards. I'm also glad that after this whole semester of POD, I have learned so much that I did not knew about before... and also all the help that was given by Miss Lisa throughout the the few months guiding us and giving us ideas on how to improve ourselves, much appreciated! :D

Wednesday, 22 May 2013

Progress

We had tutorials with Miss Lisa on our greeting cards. we had to show her 5 to 6 different themes for ideas on our upcoming assignment. I was feeling kind of lost and uninspirational the whole time when thinking of the themes we have to provide. I went around looking for possible and impossible occasions to come up with a theme, it was definitely a challenge ( i dont know why) 


This were what i came up with in the beginning. I wanted to do facial expressions since most of my doodles for the sketches were features of body parts. and i had a few ideas for it too. that was all i could come up with. I guess i wasn't sure what Miss Lisa was expecting so.. it lead me to being blur and confused.

The next day in class after a little scolding from Miss Lisa, I finally went in deep thought in a few different themes. I had the Lips theme, the facial expression theme, and the clouds theme.


after showing Miss Lisa for the second time, se liked the idea of the clouds and also asked me to look up on steampunk... since i had a little sketch on it on one of my ideas.

I had no clue on what steampunk was, was kind of excited to go on to research about it.


After a few research on what steampunk was all about, I finally got the picture on how it could be added into my cards alongside with my clouds theme. Below are a few ideas on how steampunk designs actually look like. this were the few pictures as my inspiration..


stay tune for my next post on how my cards turn out to be like :)