Saturday, 1 June 2013

Greeting cards


As I said in my previous post, my theme was clouds and steampunk. 
I went around every where looking for every possible looking steampunk materials. I got some screws and metalic looking nails in the DIY shop in Sunway Pyramid, and cut off some of my unworn bracelets and watches ( which was alright because those have been around for ages just lying there being useless. haha) 


A few of the materials I used :) 


One of the first few ideas I came up with,
 which I was very satisfied with the outcome of it.


 A " Thinking of you" card
instead of having butterflies in the tummy, I had them replace with cogs.
yay, or nay? haha


I was inspired with a picture i came across on the internet so I made this concept and was not sure what card it should be. And I initially wanted butterflies and flowers and cogs and everything with clouds coming out as the hair but it was a little too much..


This was what I had a week after tutorials. 

We were given another week to finish off everything else. which means, more time to think and more time to come up with awesome ides :D 

I had to google and search on different kinds of other occasions celebrated to come up with the last few cards. it was such a challenge having to put the theme clouds and steampunk together. I had a few ideas but a had to change it at the very end due to the materials I had. 

which was fine....
because everything turn out fine of course :) 


My " Father's day" card
I had this painted with tea as the background since I couldnt really put in cogs into this card. I could, but i just did not want all my cards looking too cliche. and this was another new thing I was doing, putting tea onto paper, I was kind of worried on how it would turn out to be like, whether it would be messy or the color would come out wrong. but i was pretty satisfied with the outcome of it :) 


TADAAA~~


my fourth card is the " Merry Christmas" card 
I wanted most of my cards to look as simple as possible, I did not want anything to messy and too much going on. so for this i had Mr Santa Claus on the front with bread made out of cotton balls ( supposingly as clouds) and heads with cogs as a little oomph to it :) 


I would say i was pretty happy with how my cards turn out to be like. what disappoint me was the type of paper that were used. It did not come across to me that I had to get proper card material paper in order for my cards to not turn out to be crumply because of the glue and paint after it dries.

hmm, but I'm just glad that I challenged myself in this, and tried a few new things during the process of making my greeting cards. I'm also glad that after this whole semester of POD, I have learned so much that I did not knew about before... and also all the help that was given by Miss Lisa throughout the the few months guiding us and giving us ideas on how to improve ourselves, much appreciated! :D

Wednesday, 22 May 2013

Progress

We had tutorials with Miss Lisa on our greeting cards. we had to show her 5 to 6 different themes for ideas on our upcoming assignment. I was feeling kind of lost and uninspirational the whole time when thinking of the themes we have to provide. I went around looking for possible and impossible occasions to come up with a theme, it was definitely a challenge ( i dont know why) 


This were what i came up with in the beginning. I wanted to do facial expressions since most of my doodles for the sketches were features of body parts. and i had a few ideas for it too. that was all i could come up with. I guess i wasn't sure what Miss Lisa was expecting so.. it lead me to being blur and confused.

The next day in class after a little scolding from Miss Lisa, I finally went in deep thought in a few different themes. I had the Lips theme, the facial expression theme, and the clouds theme.


after showing Miss Lisa for the second time, se liked the idea of the clouds and also asked me to look up on steampunk... since i had a little sketch on it on one of my ideas.

I had no clue on what steampunk was, was kind of excited to go on to research about it.


After a few research on what steampunk was all about, I finally got the picture on how it could be added into my cards alongside with my clouds theme. Below are a few ideas on how steampunk designs actually look like. this were the few pictures as my inspiration..


stay tune for my next post on how my cards turn out to be like :)

Saturday, 18 May 2013

Final

Its already May, and our first semester is about to end. with that happening, our final assignment was given to us. For our final assignment, we were to put together everything that we have learned throughout the semester.. and come up with 5 Greeting Cards

that is---

1) Rules of Thirds 


2) paper cut outs


3) Proportionate and composition
  

4) color theory 


5) and of course something that describes YOU :) 


Saturday, 4 May 2013

Cuppycakes

Few days after our trial rounds with the icings, we finally started the real thing! we head over to Nicholas's place again since he is the only one out of all of us that have an oven at home and a proper kitchen to work in too... so yea, we head to his place got all our ingredients and materials that had to be use. most of the ingredients ( flour, icing sugar, blue red yellow vanilla colorings, butter, milk)  we used were mainly purchased in Tesco and some of the materials such as the cupcake paper holder ( and extra butter) were bought at one of the cake ingredient store in SS2 ( i forgot what is it call, didnt really take down the name of it since we coincidentally came across with it). if we knew earlier shops like those existed, i would prolly get most of the ingredient there, they had most of the stuff we needed there too.

okayyyy, so we got all our stuff ready, and got down to work ( hoping for the best that most of the cupcake would come out eatable, heee)


the whisked creamy looking baking powder, butter, egg and milk. 


 us girls did the separation of the ready whisked cupcake base while the boys made more of em. 


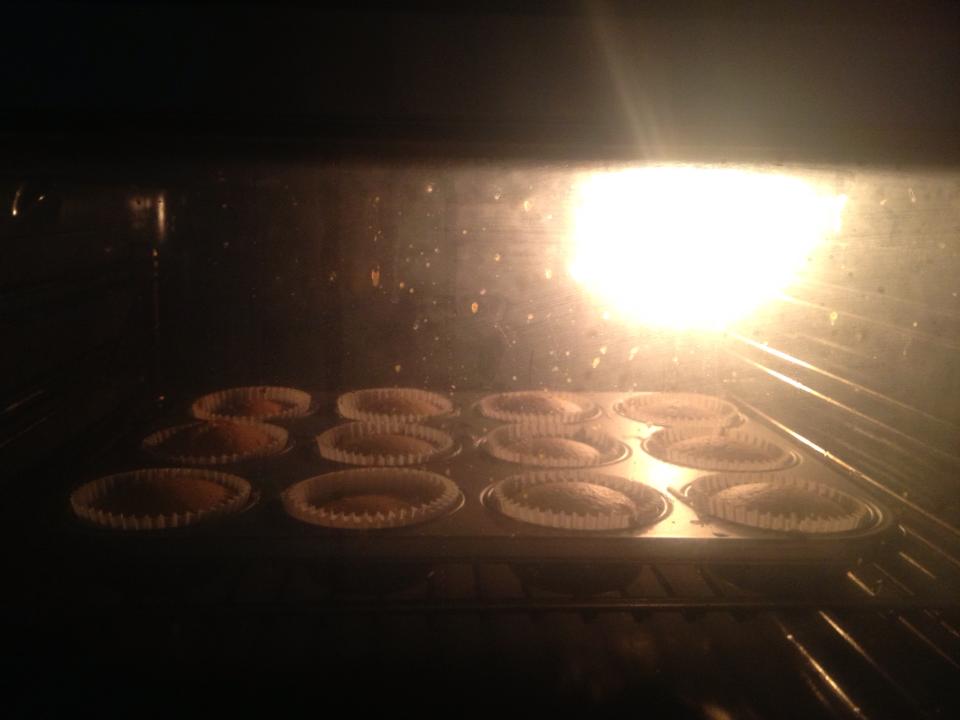
we could only do 12 at once
.
.
.


sooo every time we wait for one batch to be baked, we got our resting time for about 25 minutes, 
and also prepare how the icing was gonna be...
( of course ) 

once we were finally done with the cupcakes, we moved on to the icing. since we didnt have much big bowls to have everything mixed at the s ame time, we had to wait until we finish with the base first only to move on to the icing. I must say the Icing was pretty fun, mixing the colors was fun eventhough it was a bit of a challenge for us to get it to the correct color. we wanted solid colors but couldn't, so we ended up settling for pastel colors


beautiful isn't it? :D 

but it was kind of too sweet, couldn't help it. 

when most of our cupcake making was done, we had to work on how our cupcake were to be placed on when presenting in class. we went to one of the DIY shops in Taipan after that and got PVC tubes ( really ugly and horribly painted ones.. eww ) and some Super super super glue to have it strongly sticked together if not our cupcake would all just tumble down ( we wouldnt want that of course. haha ) 


It was mainly worked on by the guys, it was their department anyways. haha, but i mean, we girls did help a little too since we weren't much of a help to them either. especially when it came to the cutting an saw of the tubes. they also painted the tubes black and it took ages for it to be dried because the sun was setting by that time. but we managed, of course :)

that concludes our time making the whole cupcake tower.


The next morning, we got up really early. Most of us woke up feeling a little down due to a slight cold. But we got to do what we got to do. got changed and had everything placed in the car ready to head to campus for our presentation.


we didnt have the icing on until we got to campus. because it would be a hassle to carry them worrying that the icing might be destroy on the way to class.


The is our end product :) 

not really that satisfying with how the tower turned out to be like. I initially wanted more cupcakes to be done to cover the whole tower with it and not have any base seen at all, but we didn't do that since we would cost us even more.......... ARGH :( but we did put in our best to come up with this since it was our first time baking together and also being an amateur in baking we definitely learned a lot from this. 

BUT MAINLY, we definitely learned a little better about the color theory after this assignment. we had to even think of what color to be on which side and next to which color in order to have it looked presentable. 

and of course we had a lot of fun, and a lot of bonding time with each other :) xx

Monday, 29 April 2013

Trial round : color icing.

 So our next assignment is another exciting one. This time, after learning a little about the color wheel in class, we had to come up with different designs on how we can portray the color wheel instead of just forming it in a circle. 

My group came up with a few ideas, and end up choosing to do color wheel cupcakes.  CAN YOU NOT FEEL EXCITED ABOUT THIS?!  we couldnt wait for the outcome of it, especially eating em. hah! 

So before presenting our final product, we had to do a trial round especially on the icing since it involves mixing coloring to form secondary and tertiary colors out of the primary colors. 


we got all of this with a pretty affordable price during our trip to tesco :))))))


main ingredients on making the icing : 
1) unsalted butter ( softened) 
2) icing sugar
3) Eggs
4) Milk
5) coloring 


We went on google finding easy and simple recipe and did it step by step as we follow the steps given. We weren't all professional bakers, maybe baked like 2 or 3 times? so we wasnt so sure on how the procedure were... but we managed.


the outcome of the trial batch of icing were pretty alright. and at least we now know how it should be done when we/re gonna start on the final product. :)

stay tune for the next post on how our cupcake turned out to be like. xx

Saturday, 13 April 2013

Color Theory Part 2

Warm Colors

The phrase used to describe any color that is vivid or bold in nature. Warm colors are those that tend to advance in space and can be overwhelming.


Cool Colors

The phrase used to describe any color that is calm or soothing in nature. Cool colors are not overpowering and tend to recede in space. Examples of cool colors include white, gray, blue and green (think calming blue waters).

Which color is associated with stability

Green. - Promotes feelings of well-being and harmony, nature, security, stability and balance.


Color that symbolized royalty 


Purple - Purple is the color of good judgment. It is the color of people seeking spiritual fulfillment. It is said if you surround yourself with purple you will have peace of mind. Purple is a good color to use in meditation.
Purple has been used to symbolize magic and mystery, as well as royalty. 


Color of cleanliness

White - White is color at its most complete and pure, the color of perfection. The color meaning of white is purity, innocence, wholeness and completion.


Color that symbolized freshness

Green - Green is the color of nature. Nature screams freshness and keeps our environment calm and relaxing


Color associated with Joy

Yellow is the color of sunshine. It's associated with joy, happiness, intellect, and energy. Light yellow is associated with intellect, freshness, and joy. Orange combines the energy of red and the happiness of yellow


Color associated with passion and danger 

Red- Danger, passion, energy, warmth, adventure and optimism.

Though Reds have become more and more popular over the last couple of years and can range from fiery, passionate, sophisticated and warm, reds can also be overpowering and lead to headaches. It is a good idea to vary the shade of red on one wall or just use it for accessories. 


xx